
Chimney fires start in flues nobody thought were dirty yet.
Most homeowners hear “once a year” and stop there. But the real schedule is set by buildup, not the calendar: a weekend-fire family and a wood-heated farmhouse reach the danger line months apart. And when it is time to clean, the difference between a clean flue and a brush stuck halfway up it is preparation and the right kit.
This guide covers how often to clean a chimney, the signs it needs cleaning now, how to clean a chimney yourself step by step, and where the DIY line sits.
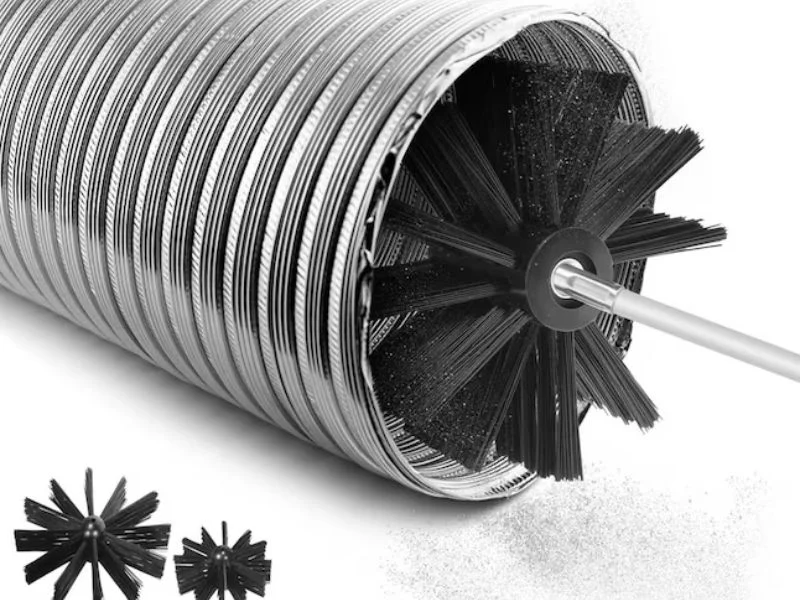
The Short Answer: Inspect Every Year, Clean at 1/8 Inch of Creosote
Have every chimney inspected once a year, and clean it whenever creosote on the flue wall reaches about 1/8 inch — for wood-primary heating that is often more than once a season. That is the guidance from the Chimney Safety Institute of America, whose education director describes cleaning “as necessary — normally when there’s a minimum 1/8-inch of deposit” in a TODAY interview on chimney care.
The two triggers do different jobs. The annual inspection catches what buildup cannot tell you: a cracked liner, a missing cap, an animal nest, or a crumbling crown. The 1/8-inch threshold decides when the sweep itself is due. A fireplace used a few times a winter may reach it every year or two; a stove that heats a house can reach it in weeks.
Why the urgency around a deposit only about 3 mm thick? Creosote is condensed wood smoke, and it burns. University of Missouri Extension’s guide to cleaning stovepipes and chimneys notes that a chimney fire can reach temperatures of up to 2,000 °F — hot enough to crack a tile liner or warp a metal chimney, and to push sparks through those cracks into the framing around the flue.
So the practical rule has two halves. Put the inspection on the calendar, and let the flue wall — checked with a flashlight — decide when to sweep. The sections below turn both into specific steps.
How Often to Clean a Chimney by Fuel and Use
Wood-primary heating usually needs sweeping once or twice a season or more; occasional fireplaces often go a year or two between cleanings; gas appliances still need a yearly inspection. University of Missouri Extension puts the full range at anywhere from once every couple of weeks to no less than once a year, depending on how much you burn, what you burn, the appliance, and how you run it.
| Setup | Typical cleaning | Why |
|---|---|---|
| Wood stove, primary heat | 1–2× per season, sometimes more | Constant smoke volume; cooler flue gases on efficient stoves |
| Fireplace, weekly winter fires | Yearly | Steady buildup |
| Occasional fireplace | Often every 1–2 years if the yearly inspection shows little buildup | Slow buildup, but nests and blockages still happen |
| Gas logs or gas insert | Inspect yearly | No wood creosote, but blockages and liner damage |
Burning habits move these numbers more than the appliance does. Creosote is condensed smoke, so anything that makes more smoke makes more deposit: unseasoned wood that smolders while it boils off water, overnight fires dampered down until the flue runs cool, and resinous softwoods that carry more volatiles up the chimney.
High-efficiency stoves deserve a note of their own. Missouri Extension explains that they keep more heat in the room and less in the flue, and creosote condenses more readily on cooler surfaces — so these stoves are particularly prone to buildup. Its recommendation is to burn an intense fire for at least half an hour daily with the damper open, to burn off deposit in small amounts.
The cheapest way to stretch the interval is fuel: dry, seasoned wood burned hot. CSIA’s guidance in the same TODAY piece points the same way — burn only dry firewood, and consider a top-down fire, which burns hotter and cleaner than a traditional build.
Signs Your Chimney Needs Cleaning Now
Smoke rolling into the room, a campfire smell on damp days, black oily flakes in the firebox, or buildup you can scratch to a visible depth above the damper all mean clean before the next fire, whatever the calendar says. Each symptom points to restricted draft, saturated deposit, or a blockage that a schedule cannot see.
The check most people can do takes two minutes. With the fire out and cold, wear goggles and a dust mask, shine a strong flashlight up past the damper, and scratch the black surface with a fireplace poker. Family Handyman’s flue guide describes the progression: a thin, flaky layer is routine; a thicker, tar-like coating is much harder to remove even with stiff brushes; and a shiny, glaze-like coat is the most problematic and nearly impossible to brush off.
| What you see above the damper | What it means | What to do |
|---|---|---|
| Light matte soot, scratch is paper-thin | Normal buildup | Keep to the schedule |
| Crusty deposit near 1/8 inch | Sweep is due | Brush-clean before the next fire |
| Thick, tar-like coating | Heavy deposit; brushing alone struggles | Rotary tools or a professional |
| Shiny, glazed coating | Hardest deposit to remove and a fire risk | Stop burning; call a certified sweep |
Look outside too. CSIA recommends a rain cap on every chimney, because water and animals are primary causes of chimney failure, and advises making sure you can see through the cap from the ground to confirm it is not blocked. A cap knocked loose by wind or a nest built in a week will not show up from the firebox.
Missouri Extension adds a useful detail for anyone looking up the flue: the heaviest creosote concentration is usually in the upper third of the chimney. A clean-looking bottom does not guarantee a clean top.
Can You Clean a Chimney Yourself? Where the DIY Line Sits
A straight, structurally sound flue with light or moderate soot is a realistic DIY job with a properly sized brush and a rod kit whose joints hold torque; tar-like or glazed creosote, offsets you cannot see through, and any sign of damage belong to a certified sweep. Even then, the annual inspection is worth paying for.
Be clear about the professional view. In the TODAY interview, CSIA’s education director expressed hesitation about recommending do-it-yourself cleaning, because most homeowners lack the expertise and equipment to inspect a chimney for other failings. That is the real limitation: brushing removes deposit, but it does not assess a liner.
Missouri Extension raises two more checks before you start. Sweeping is strenuous — pushing or pulling a brush the height of a chimney strains the back — so consider your physical condition. And make sure the chimney is structurally safe: a weak chimney can fail when a ladder or your weight leans against it.
| Condition | DIY reasonable? |
|---|---|
| Straight flue, light to moderate soot, sound masonry or liner | Yes, with the right brush and rods |
| Tar-like deposit | Possible with rotary tools; often a professional job |
| Shiny glazed creosote | No — professional removal |
| Offsets or bends you cannot see through | No, unless your kit is built for bends |
| Cracked liner, loose bricks, damage after a chimney fire | No — inspection and repair first |
If you are unsure, Missouri Extension suggests watching a professional sweep once. It is the fastest way to learn the sequence, and to decide honestly whether to do the next one yourself.
Tools for DIY Chimney Cleaning: Brush Size and Rod Count
You need a brush sized to the inside of your flue, enough rods to reach its full length, drop cloths and tape to seal the opening, a flashlight and mirror, eye and dust protection, and a shop vacuum — not a household vacuum. Getting the brush size and the rod count right before you start is what keeps the job to one afternoon.
Missouri Extension’s tool list is a good baseline: a powerful flashlight, drop cloths, wide masking or duct tape, a ladder, a mirror for looking up the flue from below, a bucket, goggles or a face shield, a dust mask, old clothes and gloves, and an industrial-type shop vacuum. It warns specifically against household vacuums, because fine soot can ruin the motor bearings and pass through the filter into the room.
Brush size. Brushes come in round, square and rectangular shapes and in many sizes, and the brush must fit your flue. Measure the inside of the flue liner, not the outside of the chimney, and buy the matching shape. A brush that is too small leaves deposit behind; one that is too large binds, which is exactly when weak rod joints fail.
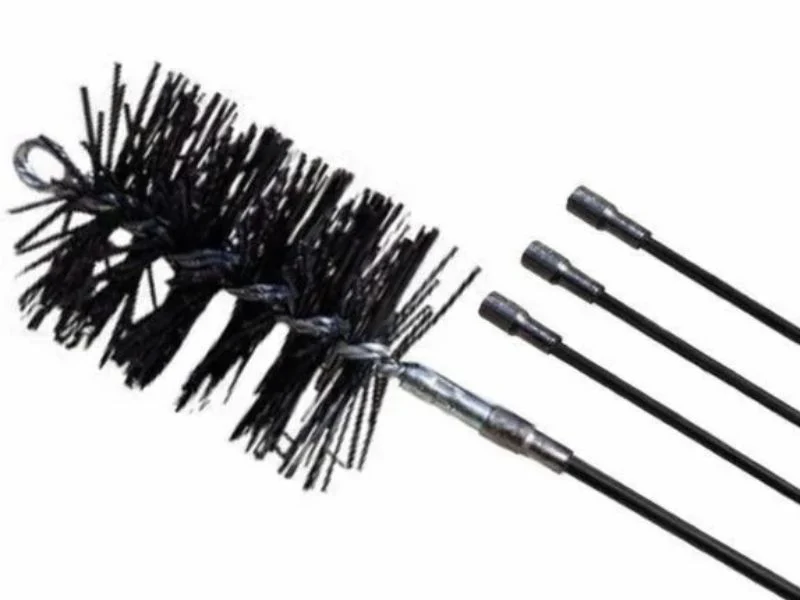
Rod count. Add the flue length to the distance from where you will stand to where the flue begins, then divide by the length of one rod section and round up. The table uses example rod lengths — check the length of the sections in your own kit.
| Total length to reach (flue + feed distance) | Rods needed at 3 ft each | Rods needed at 4 ft each |
|---|---|---|
| 15 ft | 5 | 4 |
| 20 ft | 7 | 5 |
| 25 ft | 9 | 7 |
| 30 ft | 10 | 8 |
| 35 ft | 12 | 9 |
Calculated: rods = total length ÷ rod length, rounded up. Rod lengths are illustrative examples, not a standard. Measure the actual flue from the damper to the top of the crown before buying.
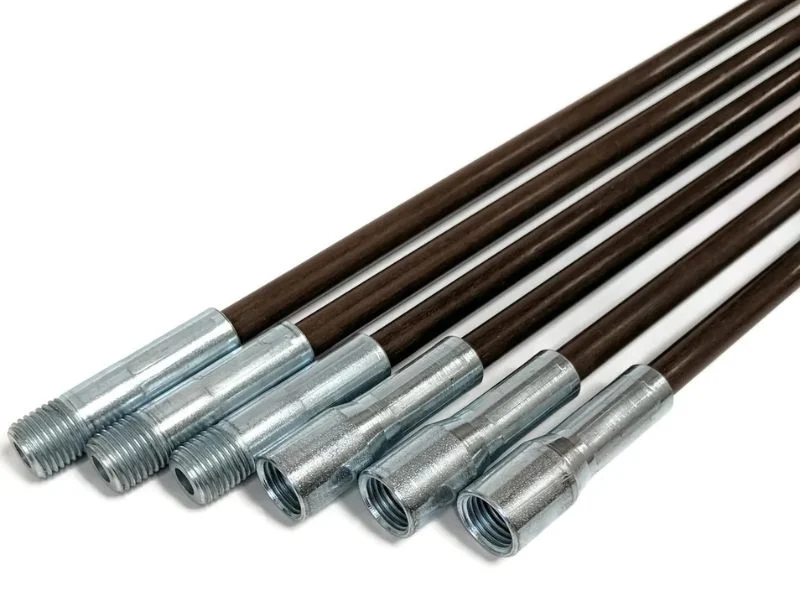
The joints matter more than the count. Every coupling in that train takes the full twisting and pushing load when the brush bites into heavy deposit halfway up. Threads cut into the rod stock hold that load; glued-on ends are the ones that strip and leave a brush stranded in the flue.
How to Clean a Chimney Step by Step (Bottom-Up With Rods)
Seal the room, confirm the fire is out, remove the damper plate, push a flue-sized brush up the chimney one rod at a time with overlapping strokes, then clean the smoke shelf and firebox with a shop vacuum and inspect with a flashlight. This is how to sweep a chimney from the hearth, which keeps you off the roof — the main reason most homeowners choose this method.
- Pick the time. Missouri Extension notes creosote comes off a warm flue more easily than a cold one — but the fire must be completely out.
- Inspect first. With a flashlight, check from the top and bottom for obstructions such as bird nests and gauge how much creosote is present.
- Open the path. On a fireplace, take out the damper plate, usually held by a couple of cotter pins; handle it carefully, because heat can make the metal brittle. Confirm any outside clean-out door opens before you start.
- Seal the room. Lay drop cloths, and tape a damp sheet or plastic over the fireplace opening, leaving a slit to feed the rods through.
- Assemble as you go. Screw the brush onto the first rod, push it into the flue, then add rods one at a time, tightening each joint fully before it goes up.
- Scrub in overlapping strokes. Work the brush up and down in short strokes as you advance, so every section of the flue wall is covered, until the brush reaches the top.
- Withdraw carefully. Pull the train back, unscrewing rods as they come out. Let the dust settle before you open the seal.
- Clean up. Sweep the smoke shelf above the damper, where debris collects, vacuum the firebox with a shop vacuum, and wire-brush remaining deposit from the firebox and smoke shelf.
- Look again. Shine the flashlight up the flue. If you still see glaze or tar, that part is a job for a professional.
Reinstall the damper plate and confirm it opens and closes fully before the next fire.
Top-Down Cleaning and Wood Stove Flues
Top-down cleaning works from the roof, feeding a brush down the flue on rods or on a rope with a weight; stove owners should also remove and clean the stovepipe separately, outdoors. Both approaches clean the same flue — the choice is about roof access and the chimney’s layout.
For top-down work, Missouri Extension describes brushes with a rope attached to one end: tie a weight to the other end to pull the brush down the chimney, and wrap the weight in cloth so it does not damage the flue if it bounces against the inside. Seal the fireplace or stove opening below first, exactly as for bottom-up cleaning. Only work on a roof you can access safely, with proper footing and fall protection.
Wood stoves add one component the fireplace does not have. Missouri Extension advises removing the stovepipe from the chimney and covering the opening before sweeping, then taking the pipe outside to clean it. Tape a bag or place a bucket at one end of the pipe to catch the creosote, and use a long-handled wire brush to scrub it out.
Missouri Extension also rules out the shortcuts that circulate online. Burlap bags stuffed with straw, tire chains or balled chicken wire can scrape some deposit, but they cannot provide enough abrasion to clean all of the creosote out of the flue. A correctly sized brush does the job they only start.
One safety point applies whichever way you work: if a chimney fire starts, call the fire department first. Missouri Extension warns never to use water on an extremely hot chimney fire, because the sudden cooling can crack the liner or warp a metal chimney; a multipurpose dry-chemical extinguisher can be used on the fire in the stove or firebox.
Manual or Rotary: Matching the Kit to the Deposit
Manual rod-and-brush kits handle the routine soot of a well-burned season; drill-driven rotary kits earn their price on heavier deposit and on flues where pushing force fades. For glazed creosote, neither replaces a professional.
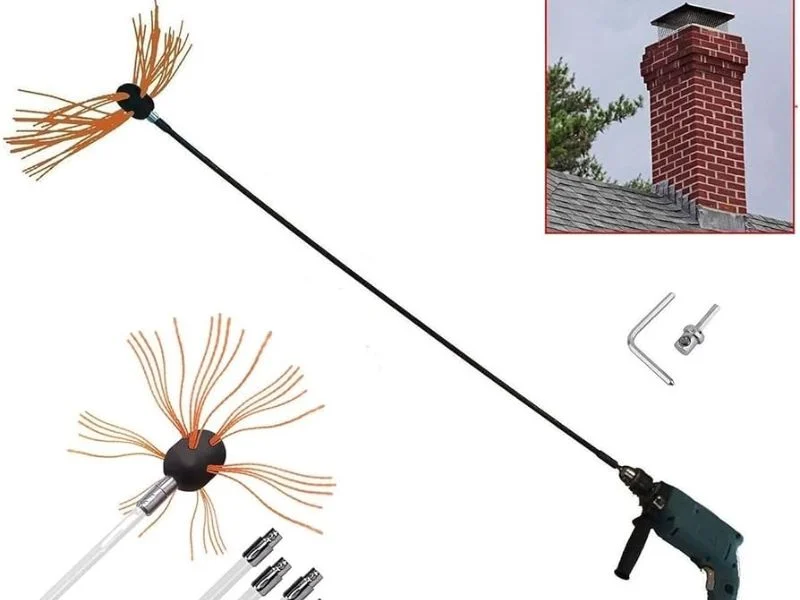
For most households burning dry hardwood, a manual kit used on schedule is enough — quiet, inexpensive and hard to get wrong. Rotary kits spin a flexible whip or brush head with a cordless drill, which cuts through thicker deposit faster and helps on stove inserts and flues with bends where hand pushing loses force.
Rod material is a real trade-off, not a marketing line. Rigid aluminum rods with machined threads feed straight flues easily, carry torque from a drill, and hold up season after season. Highly flexible polypropylene rod systems are the better choice for tight offsets, where a stiffer rod will not follow the bend. Pick for your flue, not for the rod.
Whichever drive you choose, check the joint. A rotary head multiplies torque, and it finds any weakness in the couplers. Machined threads carry that load; glued ends give it back as a brush left in the flue.
What Chimney Cleaning Costs and What a Professional Sweep Includes
A standard chimney inspection costs roughly $100 to $250 depending on roof access and chimney type, according to CSIA guidance reported by TODAY; cleaning, glazed-creosote removal and repairs add to that. Treat any online figure as a range — your quote depends on region, access and what the inspection finds.
What raises the bill is predictable: steep or high roofs, tall or offset flues, heavy or glazed creosote, animal removal, and cap or liner repairs discovered during the job. Some sweeps waive the inspection fee when cleaning or repair work is booked.
The more useful question is what you are paying for. The same TODAY piece lists what a professional cleaning should include: sweeping the fireplace; checking the firebox, liners, smoke chamber and flue; examining the chimney exterior; and inspecting the appliance for proper clearances — often with a video inspection of the flue.
That checklist is the case for an annual professional visit even if you brush the flue yourself. Your rod kit removes deposit. A sweep’s camera finds the cracked tile or shifted liner that no brush reveals, and those are the defects that turn a chimney fire into a house fire.
When to Sweep, and the Five-Minute Check Between Sweeps
Schedule the sweep for late summer or early fall, after the flue has sat dry and before the first cold snap fills every sweep’s calendar; during burning season, spend five minutes a month on a flashlight-and-yard check.
Early fall has two advantages. A problem found in a September inspection has weeks of repair window instead of days, and appointments are easier to get before the heating season is under way. If you burn heavily, plan a mid-season check as well rather than waiting for spring.
The monthly check is simple. Open the damper and look up the flue with a flashlight: if the wall changed noticeably since last month, your burning habits are depositing faster than your schedule assumes. From the yard, look at the cap for damage or blockage. In the firebox, look for crumbling mortar joints, an early sign that heat is reaching places it should not.
None of this replaces the annual inspection; it tells you whether the next sweep needs to come sooner.
For Hearth Brands: Specifying a Chimney Rod Kit That Holds Up
Three specification points decide whether a rod kit survives real flues — joints that hold under torque, a thread that matches the brushes customers already own, and rod stiffness suited to the flue — so pin down all three before sampling.
Joints. Couplings should be threads cut into the rod stock, not sleeves glued onto the ends; the glued joint is the one that fails at the first bind. Thread standard. Match the rod thread to the brush line the kit will be sold with, so replacement heads fit. Stiffness and drive. Rigid rods for straight flues, semi-flexible builds for moderate bends, and drive-rated ends if the kit will be used with a drill.
Xingyong manufactures aluminum chimney sweep rods and rod kits for hearth brands and cleaning-tool distributors: tube extruded on our own 2000-tonne press in Huai’an, threads machined into the rod, and plastic grips and end parts molded in our own injection shop, with kit packaging done at source. We have been a direct manufacturer since 2010, with ISO 9001 and IATF 16949 certification. Send a thread standard, rod count and case style for a quote within 24 hours; samples ship in 25 to 35 days. Kit options are on our chimney sweep rod page, and threaded handles for other brush heads are on our brush extension pole page.
Frequently Asked Questions
How often should a chimney be cleaned?
Have it inspected once a year and cleaned whenever creosote reaches about 1/8 inch. For a wood stove used as primary heat that is typically once or twice a season or more; for an occasional fireplace, every year or two. Gas appliances still need a yearly inspection.
How do you clean a chimney yourself?
Seal the fireplace opening, remove the damper plate, and push a brush sized to your flue up the chimney on screw-together rods, scrubbing in overlapping strokes. Then clean the smoke shelf and firebox with a shop vacuum and check the flue with a flashlight. Leave glazed creosote and damaged flues to a professional.
Is it better to clean a chimney from the top or the bottom?
Either cleans the flue. Bottom-up with rods keeps you off the roof and suits most homeowners. Top-down suits chimneys with safe roof access and is how rope-and-weight brushes work. Seal the opening below in both cases.
How much does chimney cleaning cost?
A standard inspection costs roughly $100 to $250, depending on roof access and chimney type, per CSIA guidance reported by TODAY. Cleaning, heavy or glazed creosote removal, and repairs cost more, and prices vary by region.
What happens if you don’t clean your chimney?
Creosote keeps building and hardens toward a glazed coating that is difficult to remove. If it ignites, a chimney fire can reach up to 2,000 °F, cracking tile liners and warping metal chimneys, and sparks can escape into the house framing.
How many chimney rods do I need?
Divide the total length you need to reach — the flue from damper to crown plus the distance from where you stand — by the length of one rod section, and round up. A 25 ft reach takes nine 3 ft rods or seven 4 ft rods.
What should a private-label chimney rod kit specify?
Machined, not glued, thread joints; a thread standard that matches the brush line sold with the kit; rod stiffness suited to the flues in your market; drive-rated ends for rotary use; and rod count, case and packaging. Ask for samples to be tested at full length under torque before approval.

 English
  Español
  Français
  Deutsch
  Português