
Entutorar los tomates determina si agosto trae frutos o una maraña de plantas que se derrumban.
Cada verano se repite la misma escena: las plantas sanas de junio se extienden sin control en julio, la fruta se pudre en la tierra y los endebles tutores que venían con el kit de inicio se inclinan a cuarenta y cinco grados. El método de soporte —y el material de los tutores— se decidió meses antes.
Esta guía explica qué método se adapta a cada tipo de tomate, cuándo instalarlo, cómo atarlo y por qué el tutor suele ser el punto más débil.
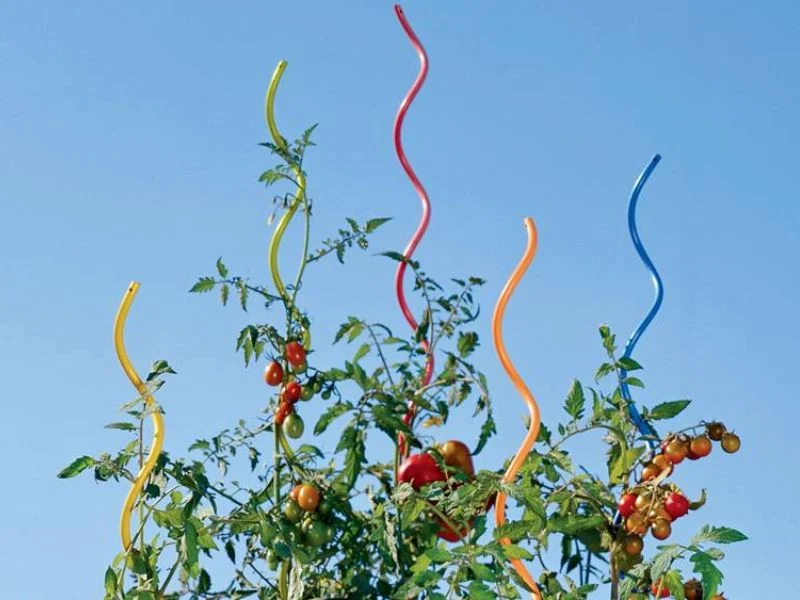
¿Qué método de entutorado se adapta mejor a cada tipo de tomate?
Las tomateras de crecimiento determinado (arbustivas) necesitan una estaca resistente o una jaula corta; las tomateras de crecimiento indeterminado necesitan una estaca alta, una escalera o un enrejado que siga trepando con ellas. La clave está en adaptar el método de cultivo al hábito de crecimiento: una jaula de 90 cm en una vid de 2,4 m fracasa en julio.
Las variedades determinadas se detienen alrededor de 3–4 pies y producen frutos en una sola tanda: un solo tutor al momento de la siembra más dos ataduras generalmente las sostienen. Las variedades indeterminadas continúan extendiéndose hasta las heladas y pueden superar los 6 pies; necesitan un tutor de 5–6 pies clavado profundamente, una escalera de tutores o una jaula lo suficientemente alta como para entregar los frutos. Guía de ensayos universitarios como la Extensión de la Universidad de Minnesota Siempre prioriza la estructura sobre la marca o el precio.
| Método | Mejor para | Altura | Cuidado |
|---|---|---|---|
| Participación única | Determinantes, filas apretadas | 4–5 pies | Empate semanal |
| Jaula | Determinantes, bajo esfuerzo | 3–4 pies | Jaulas baratas plegables |
| Escalera de estacas / rejilla | Indeterminados | 5–6 pies | Necesita conectores |
| Enrejado + cordel | Filas, invernaderos | 6 pies o más | Tiempo de configuración |
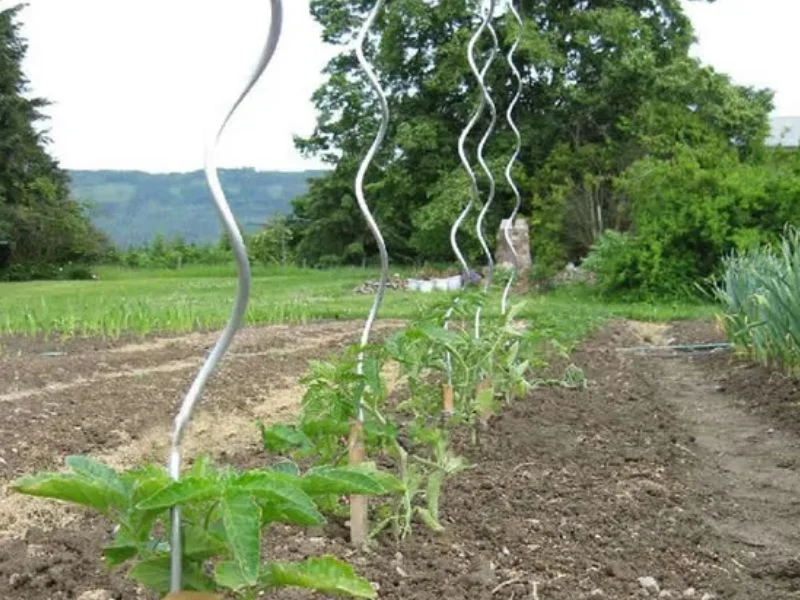
| estaca en espiral | macetas para patio | 4–5 pies | Las pesadas cerchas se deslizan |
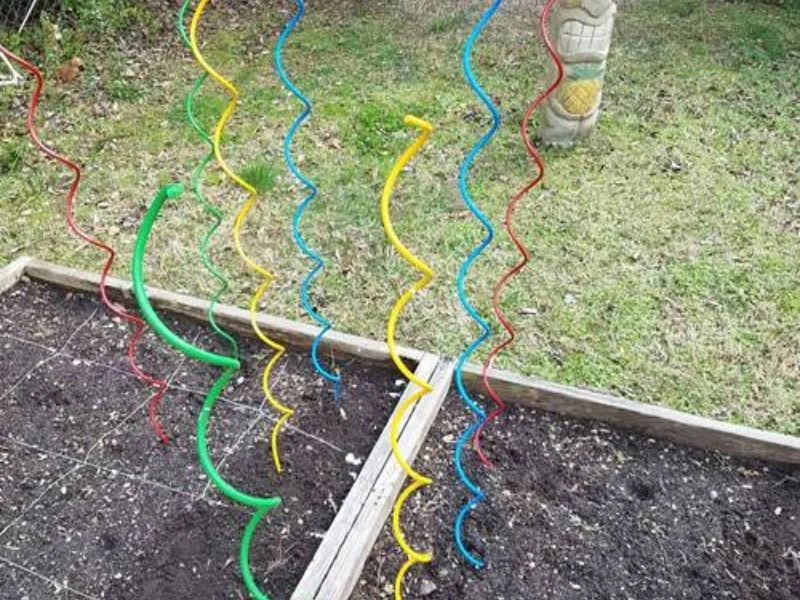
¿Cuándo entutorar las plantas de tomate?
Colocar una estaca al trasplantar —clavar una estaca en el cepellón tres semanas después— destroza las raíces que cultivaste durante la primavera. Primero coloca el soporte, luego planta a su lado y las raíces crecerán alrededor del obstáculo en lugar de ser cortadas por él.
Clava las estacas a una profundidad de 25-30 cm en parterres abiertos, y más profundamente en suelos sueltos o arenosos. En zonas ventosas, coloca las estacas en el lado donde predomina el viento, de modo que la planta se apoye en el soporte en lugar de alejarse de él. Si no pudiste plantar en el momento adecuado, coloca la estaca a la distancia de una mano del tallo e insértala lentamente en ángulo.
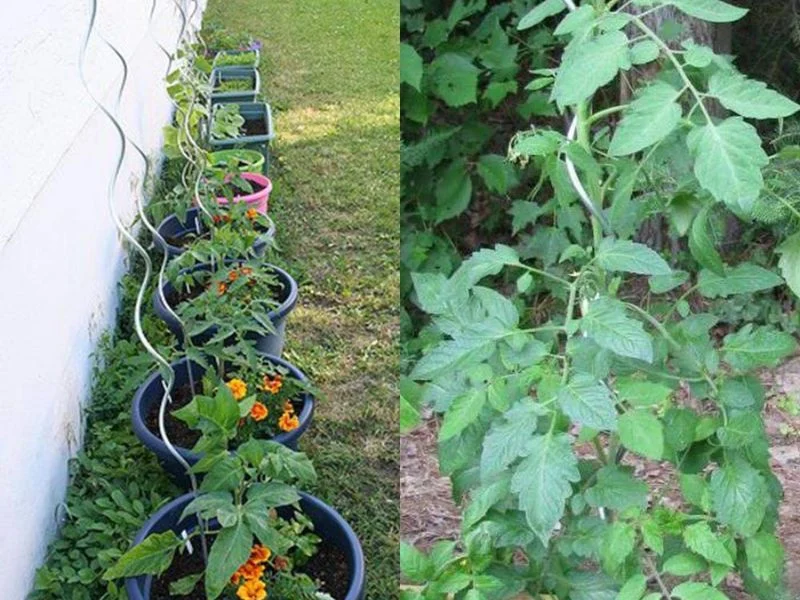
Por qué el material de la estaca decide agosto
La mayoría de los fallos en el entutorado se deben a fallos materiales: el acero oxidado se rompe a la altura del suelo y el bambú se enmohece y se agrieta, normalmente en la misma semana en que la cosecha de fruta alcanza su punto máximo. La línea del suelo es el factor determinante: los ciclos de humedad se concentran precisamente donde la carga de flexión es mayor.
El acero pintado se oxida al primer rasguño, y las manchas dejan marcas en los parterres antes de que la estaca se rompa. El bambú es compostable, lo cual es un problema, ya que el compostaje comienza en el propio parterre. Las estacas de aluminio anodizado se sitúan en un punto intermedio: el color es una capa de óxido en lugar de pintura, por lo que no hay nada que se desconche, se flexionan con las ráfagas de viento y recuperan su forma, y las mismas estacas se pueden volver a colocar la próxima primavera. Esta lógica de reutilización es la razón por la que las marcas de jardinería están reorientando sus productos; nuestro programa de estacas de soporte de aluminio para plantas crea precisamente esta clase de estacas, con conectores moldeados que convierten las mismas varillas en jaulas y escaleras.
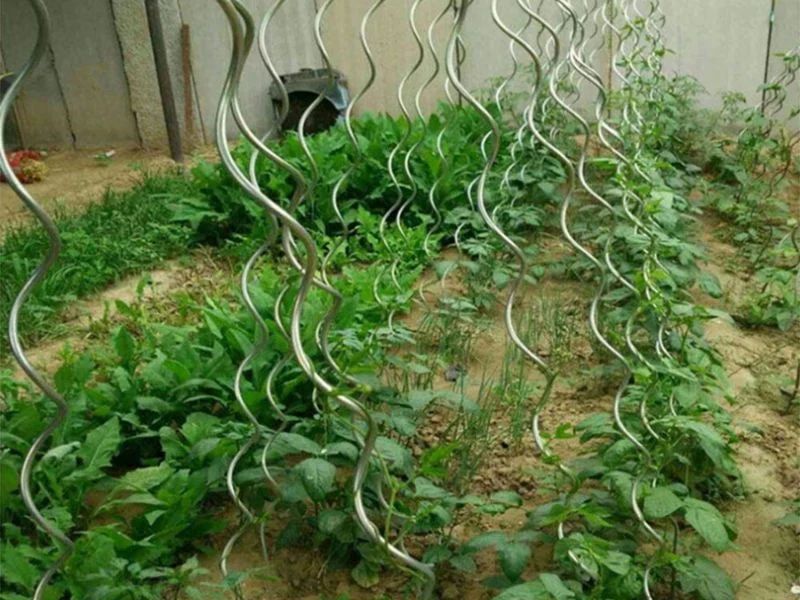
Cómo atar tomates sin cortar los tallos
Utilice ataduras suaves y anchas formando un ocho: un lazo alrededor de la estaca, un giro y un lazo suelto alrededor del tallo. El giro evita que el tallo roce con la estaca; el lazo suelto deja espacio para que se engrose.
Ata cada 20-30 cm de brote nuevo, siempre justo encima de un nudo foliar para que la atadura no se deslice. Evita usar alambre desnudo y bridas de plástico, ya que estrangulan un tallo engrosado en cuestión de semanas. Puedes usar tiras de tela, velcro de jardín o alambre de espuma; revisa las ataduras al regar y afloja las que aprieten.
Lista de verificación rápida para la temporada
Coloque soportes al trasplantar, ate las plantas semanalmente, pode por debajo del primer racimo y coloque los racimos cargados de fruta sobre la estructura antes de las tormentas. Diez minutos a la semana es mucho mejor que una mañana desastrosa en agosto.
A finales de temporada, deje de atar la rama principal de las variedades indeterminadas y pode la parte superior de la vid aproximadamente un mes antes de la primera helada; esto dirige la energía hacia la maduración de lo que ya está formado en lugar de hacia una nueva altura que el calendario no puede financiar.
Apuesta por el trasplante, no por el primer fracaso.
El momento adecuado para entutorar un tomate es el mismo día en que se planta en la tierra; clavar una estaca al lado de una planta madura rompe el cepellón que has estado cultivando durante seis semanas. Las raíces de una planta ya establecida se extienden lateralmente tanto como las hojas, y clavar una estaca a través de ellas supone la pérdida de frutos que nunca verás.
El entutorado al trasplantar también cambia la forma de atar las plantas. Una planta joven guiada por el entutorado desde la primera semana desarrolla un tallo principal más recto y necesita ataduras más flojas, mientras que una planta rastrera rescatada debe doblarse en contra de su propio crecimiento: los tallos se doblan, los racimos de flores se rompen y la planta gasta energía en sanar en lugar de dar fruto.
Si la temporada se te ha echado encima y las plantas ya están caídas, levántalas poco a poco: un pequeño esfuerzo cada semana, atándolas un poco más arriba cada vez, en lugar de un enderezamiento heroico de una sola vez.
Espaciamiento, profundidad y agarre al suelo
Clave estacas de 8 a 12 pulgadas en el suelo, a la distancia de una mano del tallo, en el lado a favor del viento predominante. La prueba de agosto mide la profundidad: una estaca que sostiene una planta cargada de frutos durante una tormenta de verano soporta mucha más fuerza que la misma estaca en junio.
La diferencia de un palmo es crucial. Debe ser lo suficientemente corta para atarla con seguridad, pero lo suficientemente larga para que la estaca no se apoye en la zona radicular más densa ni dirija el agua directamente hacia el tallo, donde comienzan las enfermedades transmitidas por el suelo. En suelos sueltos o de bancales elevados, es mejor usar una estaca más profunda que una más gruesa: la sujeción depende de la profundidad, no del diámetro.
En este caso, las estacas de aluminio anodizado ofrecen una ventaja práctica: su superficie lisa permite clavarlas con menos alteración del suelo que la madera rugosa, y se extraen limpiamente al final de la temporada en lugar de romperse a la altura del suelo como ocurre con el bambú desgastado por el tiempo.
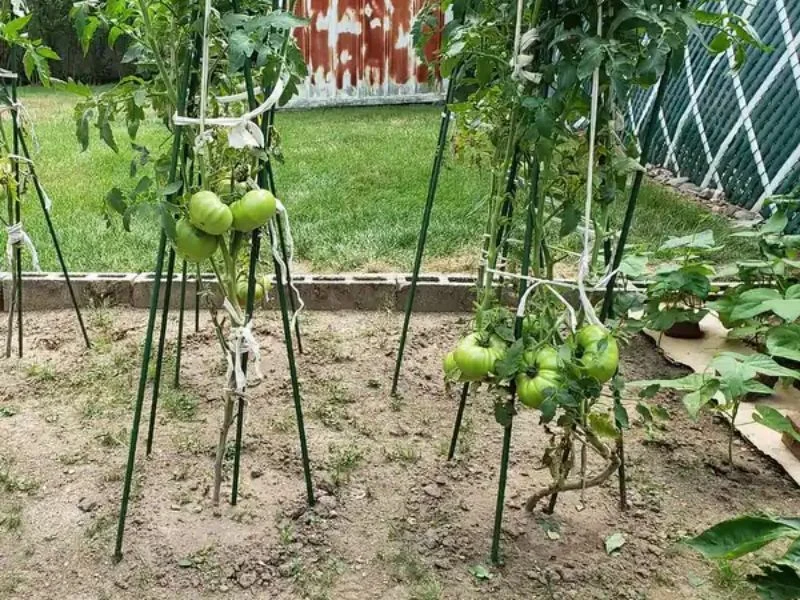
Determinado vs. Indeterminado: Dos tipos diferentes de puestos de soporte
Los tomates de crecimiento determinado (arbustivos) necesitan contención; los tomates de crecimiento indeterminado (trepadores) necesitan una escalera; adapte el soporte al hábito de crecimiento antes de elegir los accesorios. La etiqueta de la plántula determina el orden de tueste más que cualquier otro elemento de esta guía.
Las variedades de crecimiento determinado alcanzan una altura fija, dan fruto en una sola floración principal y, en general, necesitan mantenerse alejadas del suelo: una jaula o un sistema de estacas y cuerdas bajas son suficientes. Las variedades de crecimiento indeterminado siguen trepando hasta las primeras heladas (lo habitual es que alcancen los dos metros, aunque es común que lo hagan más) y requieren una estaca alta o un sistema de estacas y cuerdas que les permita ir guiándolas semana a semana.
Aquí es donde un sistema de estacas con conectores demuestra su valía: las mismas varillas sirven para construir una estructura alrededor de un arbusto y una escalera alta para una planta trepadora, de modo que un jardín mixto funciona con una sola familia de herramientas en lugar de dos compras. Los programas de venta minorista funcionan de la misma manera: una sola familia de productos que cubra ambos usos marca la diferencia entre un estante ordenado y uno desordenado.
Lazos que se mantienen firmes sin estrangular
Átalo formando un ocho —alrededor de la estaca, cruzándolo entre sí, pasando el tallo sin apretar— con algo suave y ligeramente elástico; la estaca soporta la carga, la atadura solo la dirige.
El truco está en el diseño en forma de ocho: la parte central cruzada actúa como un amortiguador, de modo que el viento mueve la planta contra la tela, nunca contra un borde duro. Tiras de camisetas viejas, cinta adhesiva suave para jardinería y ataduras de velcro para plantas funcionan bien; tanto el cordel como las bridas de plástico cortadas forman un tallo que duplica su grosor para agosto.
Revise las ataduras cada dos semanas durante la temporada alta. Una atadura suelta en junio se convierte en un torniquete para la cosecha, y un tallo aprisionado se estrangula justo cuando la carga de fruta alcanza su punto máximo. Con una estaca de aluminio lisa, las ataduras también se deslizan hacia arriba para recolocarlas en lugar de engancharse con astillas, una pequeña razón más para usar herrajes que duren más que la cuerda.
Fin de temporada: Retirar, limpiar, guardar.
Retire las estacas al finalizar la cosecha, límpielas de tierra y guárdelas secas; todo el proceso lleva solo unos minutos con aluminio y es la razón por la que las mismas estacas servirán el próximo abril. Dejar las estacas a la intemperie durante el invierno provoca que la madera se pudra a la altura del suelo y que los nudos se conviertan en un rompecabezas de diez minutos la próxima primavera. Ata las varillas, guarda los conectores en un frasco y el sistema de soporte del jardín pasará el invierno en un rincón del cobertizo en lugar de en el compost.
Preguntas frecuentes
¿Cuál es la mejor manera de entutorar las plantas de tomate?
Adapte el método a la planta: una estaca resistente de 1,2 a 1,5 metros para arbustos de crecimiento determinado, una estaca de 1,5 a 1,8 metros, una escalera o una jaula alta para vides de crecimiento indeterminado; instálelas al momento del trasplante y átelas cada 20 a 30 centímetros con ataduras suaves en forma de ocho.
¿A qué profundidad debe ir el tutor para colocar un tomate?
Entre 25 y 30 centímetros en suelos firmes y más profundo en suelos sueltos o arenosos; la profundidad a la altura de la línea del suelo es lo que resiste la fuerza de sustentación de una planta frutal en presencia de viento.
¿Debo entutorar o enjaular los tomates?
Si buscas un cultivo que requiera poco esfuerzo, utiliza jaulas para las variedades de crecimiento determinado; si prefieres un cultivo indeterminado, utiliza estacas o escaleras, ya que las vides crecen demasiado para las jaulas estándar a mediados del verano.
¿Por qué se me rompen constantemente los tutores para mis tomates?
Casi siempre se trata de materiales: el acero pintado se oxida por completo al llegar al suelo, y el bambú se enmohece y se agrieta. El aluminio flexible resiste varias temporadas con el mismo diámetro.
¿Cuándo se deben entutorar los tomates?
Al trasplantar, colocar primero la estaca protege el cepellón; añadir una después implica inclinarla lentamente a una distancia equivalente al ancho de una mano del tallo.


 English
  Español
  Français
  Deutsch
  Português